The Four Essentials of Survival Shelters
Almost all of us grew up making forts but some of us never really grow out of it. In my case, I’ve made a profession of building forts. But instead of building “forts,” I now make “shelters.” The most elegant shelter I’ve constructed is a 12’x18′ log cabin in central Wisconsin but years ago I started building simple A-frame leaf huts that were filled inside with insulation and piled high with even more insulation.
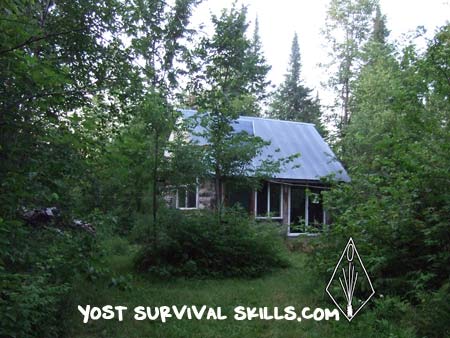
The ultimate “survival shelter.” My cabin in Central Wisconsin.

One of my first survival shelters. A simple litter hut I stayed in with temperatures well below zero.
As different as they are, my cabin and those leaf huts have the same essential components of a good shelter. And if you are stranded while out hunting, scouting, or running your trapline, knowing the components of a survival shelter could just save your life.
It can be helpful to know how to build specific kinds of shelters, but knowing how to build an igloo isn’t going to help you if you’re in a deciduous forest in July. A mud daub hut is one of the best long-term shelters, but good luck building one in the Mojave Desert. More important than knowing how to construct a certain kind of dwelling is being able to look around you and figure out how to use what you have available to keep you warm, dry and comfortable.
That’s when knowing the four essential elements of a survival shelter come into play. No two ecosystems or environments are the same, and no two shelters you build will be the same. But, all the shelters you build need to provide these things:
Waterproof Roofing
Insulation
Wind Proofing
And possibly external warmth like a Fire or Hot Rocks
Although I’ve listed each of these elements separately, they frequently overlap. Insulation on your shelter can often provide wind and waterproofing. For example if you simply pile leaves 3 feet thick over an A-frame, you will have great insulation, adequate waterproofing for most rainstorms, and enough material to block the wind. The blocks on an igloo give you insulation as well as decent wind proofing. If you are pressed for time, it’s always a good idea to get more than one survival essential out of a single component of your shelter.
Let’s take each of these in turn, starting with a waterproof roof.
Waterproof Roofing:
Like shingles on a house, you want a roof that will shed water and keep the inside of your shelter, and you, dry. A wigwam or wickiup is a perfect example of shingling. But, rather than make a free standing shelter that you have to shingle all the way around, look for a cave, rock outcropping, or a hole from the an uprooted tree that provides natural shingling.
A lot of books recommend using grasses and cattails for shingling material, and those work well. However, building a thatched hut takes a long time. Tree bark makes great roofing material and construction goes quickly. Simply start at the bottom of your shelter and work your way up.
Dirt or sod piled over a strong dome-shaped or A-frame also makes great waterproof shelter. The sod also acts as a heat sink and provides windproofing. Wet dirt is heavy though, so make sure you build a strong support system for the sod to sit on. A sod or dirt covered shelter is labor intensive though, and unless you want a long-term structure, it’s probably not worth it. But if you want a cheap “cabin” you can build with your kids AND have a small fire in, this is a great concept.
Insulation:
Insulation traps and holds the heat that is in your shelter. Light, fluffy materials with a lot of air space between them make the best insulators. The smaller the air spaces, the better the insulation will be. Piled thick enough, leaves make good insulation. Cattail down is great insulation and while you’d need a lot of it for a shelter, it can be shoved down your pants and in your shirt to keep you warm. Cattail and grass leaves all have air spaces in their leaves and make great insulation.
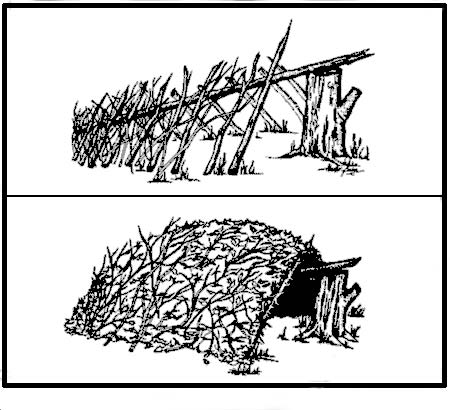
Leaves on the outside of this A-frame make good insulation, windproofing nad waterproofing. Packed with cattails and leaves inside will make it even warmer.
Animals provide great examples of building well insulated homes and we can learn a lot from them. A squirrel nest is a huge ball of insulation. Using leaves on the outside and soft, downy material on the inside is a great model for your insulated shelter too. Leaf litter huts that are packed with ferns, down, cattail or grasses make great cold-weather shelters. I once stayed in a shelter like this in Northern Wisconsin in temperatures well below zero.
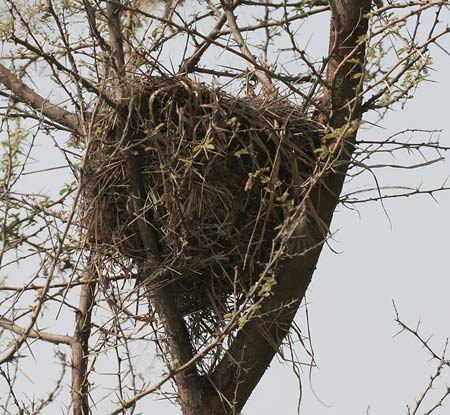
Squirrel nests are a great example of how to build a simple survival shelter
Windproofing:
A drafty shelter makes it hard to get a good night’s sleep when it’s cold outside and airproofing your shelter can be difficult. The best material I’ve found for a natural “caulk” is mud (or if there isn’t water available, dirt). Mud doesn’t insulate well, but it does provide a heat sink. I’ve seen hybrid hogans in the southwest that are basically wickiups covered in mud. I’ve built leaf litter huts and covered them with mud to make super tight shelters as well.
And, incorporating the same idea of using dirt as windproofing, I’ve made what Tom Elpel calls a “scout pit”. Tom recommends digging a body-sized hole in the ground, covering it with strong sticks and piling dirt on the frame. These are great if the ground is dry and it doesn’t get too cold, but they can get cold and damp if you don’t build a fire in the pit before you cover it with the frame and dirt.
External Heat Source:
Speaking of fire, it’s really nice to have a fire in your shelter. If you have a shelter that isn’t going to start on fire like a tinder bundle, then a small fire in the middle of the shelter is often great. Make sure you have a hole in the top of your shelter for the smoke to get out though. Otherwise, you can smoke yourself out!
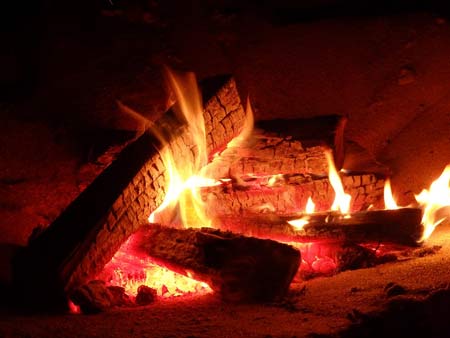
Fires can be used to heat rocks that you bring into your shelter
Most survival shelters you build on the spot won’t allow you to have a fire in them safely. In those cases you have some other options for heating your shelter. One is to simply build a fire OUTSIDE your shelter with a reflector wall or rocks or logs to radiate the heat into your shelter.
Another way to get a great night’s sleep is to dig a shallow trench the length of your body and make a fire in the trench. When the fire burns down to coals, cover it with the dirt that came out of the hole. Let it sit for a few hours so all the moisture evaporates from the soil you put on top. Then simply sleep on the warm soil if the ambient temperature isn’t going to be too low and you know it’s not going to rain.
If you suspect it might rain, gather materials for a simple leaf litter hut while the fire burns to coals. Then after you cover the coals with soil, build your debris hut over the trench.
A third way to heat your shelter externally is to heat rocks in a fire you make outside your shelter. When the rocks are hot, you bring them in your shelter to warm things up. It’s great if you can have warm rocks in your shelter while you have more rocks heating up in the fire so you can rotate them as needed. If you have a well-insulated shelter, you might only need one or two rock rotations to keep you warm all night.
Again, no two shelters you build will be the same, but if you follow these four basics of survival shelter construction, you can make a shelter that’ll keep you alive in almost every environment.
While you’re out hunting, camping or exploring, it’s always a good idea to look around and ask yourself, “If I was stuck here, what would I build a survival shelter out of and how would I make it?” If you have time, it’s great to put your theory to the test and build at least a prototype of your proposed shelter. Like everything else, the more you practice building shelters, the better you get at it.
I have more in-depth descriptions of specific survival shelters on my website at http://yostsurvivalskills.com/survival-shelters/ Take a look if you want to learn more.
Also, I welcome your comments, corrections, experiences and ideas below in the comment area below.
Talk soon- Yost

